Hey everyone! Ever felt that little shiver of intimidation when you walk past the power tool aisle at the hardware store? You are absolutely not alone, trust me on that.
I vividly remember my own beginner days, staring at rows of drills, saws, and sanders, completely overwhelmed and wondering where on earth to even begin.
It felt like a secret club I wasn’t part of, full of complicated jargon and scary-looking machinery. But here’s the really cool part: getting started with power tools isn’t nearly as daunting as it seems, especially with today’s incredible advancements making them safer, lighter, and more user-friendly than ever before.
There’s a unique satisfaction that comes from tackling a project yourself, turning raw materials into something beautiful or functional with your own two hands, and honestly, a few key power tools can get you there faster and with way less effort.
My journey from a total novice to confidently building custom furniture and tackling home renovations has been incredibly rewarding, and I truly believe anyone can unlock that same DIY superpower.
Forget the old stereotypes; modern tools are designed with us in mind, making projects achievable and genuinely enjoyable. If you’ve been itching to dive into the world of home improvement, crafting, or even just speeding up those pesky flat-pack furniture assemblies, but weren’t sure where to start, you’ve landed in the absolute right place.
Consider this your personal invitation to conquer those fears and embrace the incredible capabilities these machines offer. From understanding the basics of safety to choosing your first indispensable tool, we’re going to demystify it all, cutting through the noise to give you exactly what you need to feel confident and capable.
Ready to transform your home and your confidence? Let’s get into the nitty-gritty and truly empower your DIY adventures below!
Safety First: Befriending Your Power Tools Responsibly

Alright, so you’ve taken the plunge, and those shiny new tools are calling your name! But before you dive headfirst into your first project, let’s talk about the absolute bedrock of all DIY adventures: safety. I know, I know, it sounds a bit like your mom telling you to wear a helmet, but trust me, a few minutes now can save you a whole lot of heartache (and stitches!) later. I’ve had my share of close calls in my early days – once, I almost sent a small piece of wood flying across my workshop because I forgot to clamp it down properly. Lesson learned the hard way! The good news is, modern power tools are incredibly well-engineered, but they still demand respect. Think of it like driving a car: you wouldn’t get behind the wheel without knowing the rules of the road, right? The same goes for power tools. Always, and I mean *always*, take a moment to read the user manual. It might seem tedious, but those pages contain vital information specific to *your* tool. Understanding the safety features, how to properly change blades or bits, and even how to store it safely is paramount. Trust me, I’ve seen seasoned pros get complacent, and that’s when accidents happen. It’s not about being scared; it’s about being smart and developing good habits from the get-go. After all, the goal is to finish your project with all ten fingers and a sense of accomplishment!
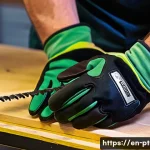
Personal Protective Equipment (PPE): Your Best Buddies
My number one rule, no matter how small or quick the job, is to grab my PPE. It’s like putting on your seatbelt – non-negotiable! For me, that means safety glasses are always on my face. Wood chips, metal shards, or even just dust can cause serious eye injuries in a flash. Don’t skimp on cheap ones either; invest in a comfortable, impact-resistant pair. I also swear by a good pair of hearing protection, especially when I’m using louder tools like circular saws or routers. That persistent ringing in your ears after a long day in the workshop? It’s not a badge of honor, it’s a warning sign. And finally, a decent pair of work gloves can protect your hands from splinters, cuts, and vibrations. I learned this when I got a nasty splinter deep under my nail from a piece of rough lumber – not fun! It’s all about creating a protective barrier between you and the potential hazards, allowing you to focus on the task at hand with confidence. Think of your PPE as your personal force field!
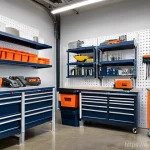
Understanding Your Workspace: A Safe Sanctuary
A messy workshop is an accident waiting to happen, and I speak from experience! My early garage days were a tangled mess of extension cords and tools strewn everywhere. It took a few stumbles (thankfully minor!) for me to realize the importance of a clean and organized workspace. Make sure your work area is well-lit, free of clutter, and that you have enough room to maneuver safely around your project and your tools. Clear any tripping hazards like power cords and ensure your work surface is stable. I also always make sure to properly secure my workpiece. Whether it’s with clamps, vises, or a non-slip mat, preventing your material from shifting unexpectedly is crucial for both accuracy and safety. It’s not just about keeping things neat; it’s about creating an environment where you can concentrate fully on your craft without worrying about what might go wrong. A well-prepared space is a safe space, allowing your creativity to flourish without unnecessary risks.
My Go-To Starter Kit: The Absolute Must-Haves for DIY Newbies
When I first started, walking into a hardware store felt like stepping onto another planet. So many tools, so many brands, and a seemingly endless array of options! It was enough to make my head spin. Over the years, through trial and error (and a few questionable purchases), I’ve distilled the absolute essentials down to a core group of power tools that will get almost any beginner project off the ground. You don’t need to empty your bank account to start building or fixing things around the house; a few versatile tools will serve you well. My personal journey began with a basic corded drill and a jig saw, and honestly, those two tools opened up a world of possibilities for me. From assembling furniture faster than ever before to cutting out custom shapes for crafts, they were invaluable. I’ve seen countless folks get overwhelmed and buy too much too soon, only for those tools to sit unused. The trick is to start small, get comfortable with your core tools, and then expand your collection as your skills and projects grow. Think of it as building your DIY army one soldier at a time.
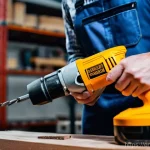
The Mighty Drill/Driver: Your First True Friend
If there’s one tool I’d recommend every single beginner invest in first, it’s a good quality drill/driver. Seriously, it’s a game-changer! I still remember the sheer relief when I got my first cordless drill. No more struggling with screwdrivers for hours on end to assemble flat-pack furniture or hand-drilling pilot holes. This versatile workhorse will be your absolute best friend for countless tasks, from driving screws into wood or drywall to drilling holes for shelving, hanging pictures, or even mixing paint (with the right attachment!). My advice? Go cordless. The freedom of not being tethered to an outlet is incredibly liberating, especially when you’re working in different areas of your home or even outdoors. Look for one with a decent battery life and a comfortable grip. You’ll want one with a clutch setting, which prevents you from over-tightening screws and stripping them, a feature I truly wish I had understood better in my early days! It’s an investment that pays for itself almost immediately in time and frustration saved.
The Versatile Jig Saw: Unleash Your Inner Carver
After a drill, my next top pick for beginners is a jig saw. This magical tool is perfect for making curved cuts, intricate shapes, and even straight cuts in thinner materials like plywood or MDF. I’ve used my jig saw for everything from cutting out custom shelves for a pantry to creating decorative wooden signs. It’s surprisingly easy to control once you get the hang of it, and the ability to change blades quickly for different materials (wood, metal, plastic) makes it incredibly versatile. You’ll find yourself reaching for it more often than you think! When I first tried it, I was amazed at how easily it could follow a drawn line, allowing for a level of creativity I hadn’t experienced with hand tools. Look for one with variable speed control, which gives you greater precision, and a comfortable ergonomic design. It’s the kind of tool that makes you feel like a true craftsperson, empowering you to bring your creative visions to life with relative ease.
Unlocking Drilling Domination: Your First Steps with Drills and Drivers
So, you’ve got your drill/driver – fantastic! Now, let’s talk about how to really make the most of it, beyond just pushing a button. I remember feeling a bit clumsy with my first one, fumbling with bits and wondering why my screws weren’t going in straight. It’s totally normal! The key is understanding a few fundamental techniques that will transform you from a hesitant beginner to a confident drilling maestro. The beauty of these tools lies in their precision and power, but harnessing that requires a little finesse. I’ve learned that a stable stance and proper grip make all the difference, preventing the drill from “walking” across your material and ensuring your holes are exactly where you want them. Don’t be afraid to practice on some scrap wood first; that’s exactly how I built my confidence. It’s not about brute force; it’s about control and knowing your tool. Once you get these basics down, you’ll be amazed at how quickly you can tackle projects that once seemed daunting, and you’ll start to appreciate the subtle hum of a well-used drill.
Choosing the Right Bit: The Secret to Success
This is where many beginners (including my past self!) go wrong: using the wrong drill bit for the job. It’s like trying to cut steak with a butter knife – it’s just not going to work well! There’s a dazzling array of bits out there, and each one has a specific purpose. For wood, you’ll typically use brad point bits for clean holes, or spade bits for larger diameters. For metal, you need high-speed steel (HSS) bits, and for masonry, carbide-tipped bits are your go-to. I can’t tell you how many dull bits I went through before realizing that matching the bit to the material is crucial. Not only does it make the job easier, but it also prolongs the life of your bits and your drill. When driving screws, you’ll need driver bits that match the head type (Phillips, flat, Torx, etc.) and size of your screws. A good starter set of drill and driver bits is an absolute must-have. Take a moment to understand what you’re drilling into, and pick the appropriate bit – it’s a small step that makes a huge difference in the quality of your work and your overall experience. Trust me, the right bit feels like magic!
Drilling Straight and True: Tips for Precision
Getting a perfectly straight hole can sometimes feel like an Olympic sport, especially when you’re just starting out! One of the biggest challenges I faced was keeping the drill level. My holes always seemed to wander. The trick I learned is to start slowly, let the bit find its center, and then gradually increase speed. Apply steady, consistent pressure directly in line with the drill bit, not at an angle. For critical holes, a drill guide or even a simple piece of painter’s tape marked with a perpendicular line can be incredibly helpful. If you’re drilling all the way through a workpiece, it’s often a good idea to drill from one side until the tip of the bit just breaks through, then flip the material over and finish drilling from the other side. This prevents “blowout” – splintering on the exit side – which was a constant source of frustration for me. And remember those pilot holes for screws? They’re not just for show! Drilling a slightly smaller pilot hole before driving a screw prevents the wood from splitting and makes the screw go in much easier and straighter. These little techniques might seem minor, but they add up to much cleaner, more professional-looking results, and they’ll save you a ton of frustration.
Slicing and Dicing: Demystifying Common Saws for Home Projects
Saws are, without a doubt, one of the most exciting (and sometimes intimidating!) categories of power tools. The thought of cutting through wood with precision and speed can feel incredibly empowering. When I first got my circular saw, I remember feeling a mix of excitement and genuine fear. It looked so powerful! But once I understood the basics and practiced on scrap material, it quickly became one of my most indispensable tools. There’s a saw for every job imaginable, from rough demolition to fine joinery, and figuring out which one you need for your project can feel like a puzzle. For beginners tackling typical home improvement or crafting projects, you won’t need an entire carpentry shop. Instead, focusing on one or two versatile saws will cover most of your needs and help you build confidence without getting overwhelmed. My goal here is to help you cut through the confusion and understand the saws that will truly make a difference in your DIY journey. Just like with drills, the right saw for the job makes all the difference in achieving clean, accurate cuts and, most importantly, staying safe!
The Circular Saw: Your Straight-Line Hero
For making straight, accurate cuts in larger pieces of wood or sheet goods like plywood, the circular saw is your absolute best friend. Seriously, it’s a powerhouse! I’ve used mine for everything from cutting down two-by-fours for framing to ripping sheets of plywood for cabinets. It’s faster and far less tiring than a hand saw for these kinds of tasks. My big tip here is to use a guide. Whether it’s a factory-made straight edge or just a clamped-down straight piece of wood, a guide will help you achieve perfectly straight cuts every single time. Trying to freehand a long cut with a circular saw as a beginner is a recipe for wobbly lines and frustration. I learned that the hard way on my very first workbench build! Also, pay attention to the blade: a blade with more teeth (e.g., 40-60 teeth) will give you a smoother cut, while fewer teeth (e.g., 24 teeth) are better for faster, rougher cuts. Always ensure the blade is sharp and clean for optimal performance and safety. Once you get comfortable with setting your depth and following a guide, the circular saw will open up a whole new world of woodworking possibilities for you.
The Oscillating Multi-Tool: The Ultimate Problem Solver
Okay, this isn’t technically a “saw” in the traditional sense, but the oscillating multi-tool is a true unsung hero for DIYers, especially beginners, and it often has saw attachments! I swear by mine for so many fiddly tasks that other tools just can’t handle. It’s incredibly versatile, capable of cutting, sanding, grinding, and scraping in tight spaces. Think about trimming door jambs for new flooring, cutting out a small section of drywall, or sanding in a corner – this tool excels at all of them. Its oscillating action makes it much safer than many other cutting tools, as the blade doesn’t spin or move rapidly in a single direction. I absolutely love its precision for plunge cuts where you need to start a cut in the middle of a piece of material, something that’s difficult or impossible with many other saws. My initial skepticism about this tool quickly turned into genuine affection after my first few projects. It’s not usually the first tool people buy, but once you have one, you’ll wonder how you ever lived without it. It’s the ultimate problem-solver for those awkward, seemingly impossible tasks around the house.
The Art of Smooth: A Sander for Every Surface

There’s something incredibly satisfying about taking a rough, unfinished piece of wood and transforming it into something silky smooth. Sanding is often seen as a tedious chore, but with the right power sander, it becomes a much more enjoyable and efficient process. Trust me, I spent way too many hours hand-sanding in my early days, and while there’s a place for it, a good power sander saves your arms, your time, and your sanity! The key is understanding that “sanding” isn’t a one-size-fits-all activity. Different projects and materials call for different types of sanders and, crucially, different grits of sandpaper. I’ve learned that patience and progressing through grits (starting coarse and moving to fine) are far more important than just grinding away with one type of sandpaper. The wrong approach can actually leave more scratches than it removes! Investing in a quality sander not only speeds up your work but also gives your projects that professional, finished look that truly makes them shine. It’s all about creating a perfect canvas for whatever finish you envision, and a good sander is your primary brush.
Random Orbital Sander: Your Everyday Workhorse
If you’re only going to get one power sander, make it a random orbital sander. Hands down, it’s the most versatile and beginner-friendly option out there! I use mine constantly for almost every project that involves wood. What makes it so great? Its sanding pad moves in tiny, random orbits, which virtually eliminates the swirl marks that other sanders (like a purely orbital sander) can leave behind. This means a smoother, more even finish with less effort. I’ve used mine on everything from preparing furniture for painting to smoothing out tabletops before staining. It’s comfortable to hold, relatively quiet, and most models have dust collection systems that dramatically reduce airborne dust – a huge plus for your lungs and your cleanup efforts. When choosing sandpaper for it, remember to start with a coarser grit (like 80 or 100) to remove material and imperfections, then gradually work your way up to finer grits (like 150, 220, or even 320) for that buttery smooth finish. It’s an indispensable tool that will elevate the quality of all your woodworking and finishing projects.
Detail Sander: Getting into the Nooks and Crannies
While the random orbital sander is fantastic for larger flat surfaces, there will inevitably be those awkward corners, tight spaces, and intricate details that it just can’t reach. That’s where a detail sander (often called a “mouse” sander because of its shape) truly shines. I used to struggle endlessly with hand-sanding these areas, often ending up with uneven results or scraped knuckles. This little gem, with its triangular sanding pad, is designed specifically for precision work in those hard-to-reach spots. I find it invaluable for finishing furniture with carved details, sanding inside cabinet corners, or even prepping window frames for painting. It’s lightweight, easy to maneuver with one hand, and accepts small, triangular sandpaper sheets that are usually easy to attach. While it won’t replace your random orbital sander for broad areas, it’s the perfect companion for adding those professional finishing touches that make a project truly stand out. It’s the kind of specialized tool that, once you own it, you’ll wonder how you ever managed without its ability to get into every little crevice.
Powering Your Progress: Corded vs. Cordless Considerations
One of the first big decisions you’ll face when buying power tools, especially as a beginner, is whether to go corded or cordless. This choice can feel a bit like picking sides in a tech debate, and honestly, there are valid arguments for both! I remember agonizing over this when I bought my first drill. Was the extra cost of a cordless worth it? Would a corded tool be more reliable? Over time, and through countless projects, I’ve come to appreciate the strengths of each. The landscape of power tools has changed so much, with cordless technology advancing leaps and bounds in recent years. Batteries are more powerful, last longer, and charge faster than ever before. However, corded tools still hold their own, especially for certain applications. Understanding the pros and cons of each will help you make an informed decision that best suits your needs, your budget, and the types of projects you envision tackling. It’s not about one being inherently “better” than the other, but rather about choosing the right power source for the right job, and building a system that works for *you*.
The Freedom of Cordless: Mobility and Modernity
For most beginners, especially with tools like drills, impact drivers, and even smaller saws and sanders, I almost always recommend going cordless. The sheer freedom of not being tethered to an outlet is a game-changer. Imagine working on a project in your backyard, up a ladder, or in a dimly lit corner of your attic without having to worry about finding an outlet or tripping over extension cords. That’s the beauty of cordless! Modern lithium-ion batteries provide impressive power and runtimes, and many brands offer a “platform” where one battery system powers a whole range of tools. This is a huge advantage for me – I can swap the same battery from my drill to my impact driver, then to my jig saw, saving money and reducing clutter. While they might have a higher initial cost and require battery charging, the convenience and versatility often outweigh these factors for the typical DIYer. Just make sure to pick a reputable brand and consider starting with a “kit” that includes a tool, battery, and charger to get the best value.
The Unwavering Power of Corded: Reliability and Value
Now, don’t write off corded tools just yet! For certain tasks and certain tools, corded options still reign supreme, especially when continuous, unwavering power is paramount. If you’re going to be doing long, heavy-duty tasks – think cutting dozens of two-by-fours with a circular saw all day, or running a router for extended periods – a corded tool will offer consistent power without worrying about battery drain. They’re often lighter since they don’t carry a heavy battery pack, and typically, they have a lower upfront cost than their cordless counterparts. For tools that stay in one spot, like a bench grinder or a miter saw, a corded model makes perfect sense. I still have a few corded tools in my workshop for those specific applications where I need maximum power and don’t want to stop to swap batteries. They’re incredibly reliable and offer excellent value, especially if your projects frequently involve tasks that demand sustained power. It really boils down to balancing power needs with mobility requirements.
Where to Hunt for Deals: Smart Shopping for Your Tool Collection
Let’s be real: setting up your first power tool collection can feel like a significant investment. I remember constantly checking my bank balance after every tool purchase, wondering if I was doing it right. But here’s the secret I’ve picked up over the years: you absolutely don’t need to pay top dollar for every single tool, especially when you’re just starting out! There are smart ways to build your arsenal without breaking the bank, allowing you to get more bang for your buck and accelerate your DIY journey. My strategy has always been a mix of new and pre-owned, high-end and budget-friendly, always keeping an eye out for value. It’s about being a savvy shopper, knowing where to look, and understanding when to splurge a little versus when to save. Don’t fall into the trap of thinking you need the absolute latest and greatest models right away. Many slightly older or lesser-known brands offer fantastic performance for a fraction of the cost, especially for a beginner who might not immediately push a tool to its absolute limits. Building your collection is a marathon, not a sprint!
Navigating Retailers: When to Buy New
When it comes to buying new power tools, your big-box hardware stores like Home Depot, Lowe’s, or even smaller independent hardware shops are usually your first stop. They offer a wide selection of brands, good return policies, and often have sales around major holidays (think Black Friday, Memorial Day, Labor Day). I’ve found some of my best deals on new tools during these seasonal sales! Online retailers like Amazon also offer competitive pricing and convenience, but make sure to check reviews. For specialized tools or higher-end professional-grade equipment, you might explore specialty tool stores or even directly from the manufacturer’s website. My advice for beginners buying new is to look for “kits” that bundle a tool with batteries and a charger. These often represent significant savings compared to buying each component separately. Also, keep an eye out for “bare tools” – tools sold without batteries or chargers – if you’ve already committed to a particular cordless battery platform. It’s a great way to expand your collection efficiently. Always compare prices across different retailers before making a purchase; a little research can save you a surprising amount of money.
Uncovering Gems: The World of Used Tools
This is where I’ve found some of my absolute favorite tools and saved a ton of money! Buying used can be a fantastic way to acquire quality power tools, especially if you know what to look for. Flea markets, garage sales, estate sales, and online marketplaces like Facebook Marketplace or Craigslist are treasure troves. I’ve snagged perfectly functional, high-quality tools for a fraction of their new price. The key here is inspection. Always plug in corded tools and test them out. For cordless tools, if possible, ask to see it run with a battery (or bring your own if it’s the same brand). Check for excessive wear, strange noises, or damaged parts. Sometimes, a tool just needs a good cleaning or a new brush to run like new. This is also a great place to find older, heavy-duty tools that were built to last. While there’s always a bit of a gamble with used items, the potential savings are huge. Just be a smart, cautious buyer, and don’t be afraid to walk away if something doesn’t feel right. My workshop is a testament to the fact that you can build an amazing tool collection without always buying brand new!
| Tool Category | Key Benefits for Beginners | Typical Cost Range (USD) | My Quick Tip for Buying |
|---|---|---|---|
| Cordless Drill/Driver | Incredibly versatile for drilling and driving screws; excellent mobility. | $80 – $200 (for a kit) | Look for a kit with two batteries and a charger for continuous work. |
| Jig Saw | Great for curved cuts, intricate shapes, and softer materials. | $50 – $120 | Variable speed control is a must-have for precision. |
| Circular Saw | Essential for straight cuts in larger wood pieces and sheet goods. | $60 – $150 | Always use a straight edge or guide for cleaner cuts. |
| Random Orbital Sander | Produces smooth, swirl-free finishes on flat surfaces; good dust collection. | $50 – $130 | Invest in a good assortment of sandpaper grits. |
| Oscillating Multi-Tool | Invaluable for cutting, sanding, and scraping in tight, awkward spaces. | $70 – $180 (for a kit) | Check for a wide range of available attachments for maximum versatility. |
Wrapping Things Up
Whew, we’ve covered a lot today, haven’t we? From befriending your first power tools to understanding the nuances of cutting and smoothing, and even navigating the shopping maze – it’s a journey, not a destination. My hope is that you’re feeling a bit more confident and a lot less intimidated. Remember, every seasoned pro started right where you are, probably making a few more mistakes than they’d like to admit! The most important thing is to take that first step, prioritize safety, and truly enjoy the process of bringing your ideas to life. There’s a unique satisfaction that comes from creating something with your own hands, and I can’t wait for you to experience it fully.
Handy Tips You’ll Be Glad You Knew
1. Start with one, master it, then expand: Don’t feel pressured to buy every tool under the sun right away. When I first started, I often felt overwhelmed by the sheer number of options. My best advice, and something I truly believe in, is to choose one or two foundational tools, like a good drill/driver and a versatile jigsaw, and really get comfortable with them. Learn their quirks, understand their capabilities, and build your confidence before adding more. This approach will not only save your wallet from unnecessary purchases but also prevent that feeling of being swamped by too much new gear. It’s about building a solid foundation, one successful project at a time.
2. Your tool’s manual is your secret weapon: I know, I know, who reads manuals these days? But trust me on this one. Every tool is a little different, and the manufacturer’s manual is packed with crucial information about its specific safety features, maintenance, and optimal usage. I can’t tell you how many times I’ve consulted a manual after hitting a snag, only to find the exact solution staring me in the face. It’s also vital for understanding how to properly change blades or bits and even how to store it safely. Consider it your tool’s personalized instruction guide – a quick read can genuinely save you headaches and help you unlock its full potential.
3. Practice makes perfect (and prevents costly errors): Before you tackle your dream project, grab some scrap wood or materials that mimic your actual project and practice. This is how I truly learned to make straight cuts with a circular saw or drill perfectly perpendicular holes. There’s a learning curve with every new tool, and using inexpensive scrap allows you to experiment with different speeds, pressures, and techniques without the fear of ruining your good materials. It builds muscle memory and boosts your confidence immensely. Think of it as your personal training ground, where mistakes are cheap lessons, not expensive regrets.
4. Clean tools are happy, efficient, and safer tools: It might seem like a small thing, but keeping your tools clean and well-maintained is a game-changer for their longevity and performance. Dust, sap, and debris can build up, affecting how smoothly parts move, dulling blades, and even leading to overheating. After a project, I always take a few minutes to wipe down my tools, clear out dust bags, and inspect them for any wear and tear. A dull blade or bit not only makes your tool work harder but can also be a safety hazard, causing kickbacks or slips. A little bit of TLC goes a long way in ensuring your tools are always ready for action and last for years.
5. Matching the bit/blade to the material is non-negotiable: This is one of those “aha!” moments I had early in my DIY journey. You wouldn’t use a screwdriver to hammer a nail, right? The same logic applies to drill bits and saw blades. Using the correct type and size of bit for drilling into wood, metal, or masonry, or choosing the right saw blade for cross-cutting versus ripping, makes an enormous difference. It ensures cleaner cuts, prevents damage to your workpiece and the tool, and significantly improves safety. Always take a second to consider the material you’re working with and select the appropriate accessory – it truly elevates your craftsmanship.
Key Takeaways
Ultimately, diving into the world of power tools is about empowerment and creating. Always remember that safety is your top priority – wear your PPE, keep your workspace clear, and respect the power in your hands. Start smart by focusing on a few versatile tools and learn them well before expanding your collection. And don’t forget, the journey of learning and creating is the most rewarding part. Embrace the challenge, enjoy the process, and soon you’ll be confidently tackling projects you once only dreamed of. Happy making!
Frequently Asked Questions (FAQ) 📖
Q: Safety first! What are the absolute must-know safety tips before I even pick up a power tool?
A: Oh, this is such a brilliant question, and honestly, it’s where we all need to start. I can’t tell you how many times I’ve seen people (myself included, way back when!) get a little too eager and skip the basics.
But trust me, a few seconds of preparation can save you a world of hurt. First off, eye protection is non-negotiable. Seriously, grab some safety glasses or goggles that fit well; splinters and dust have a nasty habit of finding your eyes.
Second, wear appropriate clothing: think snug fits, no dangling drawstrings, and definitely tie back long hair. Loose items can get caught in moving parts, and that’s a nightmare nobody wants.
And gloves? Absolutely, especially if you’re handling rough materials, but make sure they don’t hinder your grip or dexterity. Finally, always, always unplug your tool before changing blades, bits, or making any adjustments.
This one feels like a no-brainer once you’ve been around the block, but in the beginning, it’s easy to forget in the heat of the moment. I remember almost learning this lesson the hard way with a saw blade; my heart definitely jumped into my throat!
So, take a moment, gear up, and double-check before you even hit that power button. It’s truly about building good habits from day one.
Q: There are so many tools! If I’m just starting out, which one should I buy first to get the most bang for my buck?
A: This is the million-dollar question for every budding DIYer, right? When I first stepped into that massive power tool section, my brain just about exploded.
There’s a tool for everything, it seems! But if I had to pick just one, my absolute top recommendation for a beginner, without a shadow of a doubt, would be a good quality cordless drill/driver.
And when I say “good quality,” I don’t mean you need to break the bank, but invest a little more than the cheapest option. Why a drill/driver? Because it’s incredibly versatile.
You can use it to assemble furniture faster than ever, hang shelves, install curtain rods, pre-drill holes for screws (which is a game-changer for preventing wood splits, trust me!), and even drive screws like a pro.
Mine has been my faithful companion on countless projects, from building a custom bookshelf to putting up picture frames. The cordless aspect means you’re not tethered to an outlet, giving you so much freedom to move around your workspace.
Look for one with a good battery life (lithium-ion is key!) and a comfortable grip. You’ll be amazed at how quickly this one tool transforms your capabilities and makes you feel like a DIY superhero!
Q: Okay, I have my first tool, but what kind of projects can I actually tackle as a beginner without getting overwhelmed?
A: Fantastic! You’ve got your first tool, and that’s a huge step. Now, let’s talk about putting it to good use without feeling like you’ve bitten off more than you can chew.
My advice? Start small and build your confidence. Don’t immediately try to build a complex treehouse unless you’ve got serious prior experience!
Think about projects that are manageable, have a clear end goal, and where mistakes aren’t catastrophic. Assembling flat-pack furniture is a perfect example; your drill/driver will make quick work of all those screws, saving your wrists and your sanity.
Hanging pictures or shelving is another great one, allowing you to practice precise measurements and using your drill for anchors. I remember the sheer joy I felt after successfully hanging my first gallery wall perfectly straight – it was such a simple project, but it gave me a massive confidence boost.
You could also try building very simple storage boxes or a small planter. These projects help you get comfortable with the feel of the tool, understand basic measuring and cutting principles (even if you’re just using pre-cut wood for now), and see tangible results quickly.
The key is to choose something you’re genuinely excited about and can realistically finish in a day or two. You’ll gain experience, learn problem-solving, and most importantly, have fun doing it!