Hey there, fellow DIY enthusiasts and workshop warriors! You know that feeling, right? The hum of a powerful drill, the satisfying cut of a precision saw, or the sheer joy of transforming raw materials into something incredible.
Power tools are absolute game-changers, making our projects faster, easier, and frankly, a whole lot more fun. I’ve spent countless hours in my own workshop, and I can tell you there’s nothing quite like the sense of accomplishment you get from a job well done, especially when those power tools are singing.
But let’s be honest, sometimes that excitement can lead us astray. Even with all the incredible advancements we’re seeing today – smart tools with automatic shut-off features, advanced ergonomics, and even real-time diagnostics that tell us when something’s off – a momentary lapse in judgment or a simple oversight can quickly turn a productive afternoon into a frustrating, or even dangerous, experience.
I’ve seen it happen, and I’ve certainly learned a few hard lessons myself over the years. It’s easy to get a little overconfident, or maybe just a tad too rushed, and before you know it, you’re looking at a botched cut, a damaged piece, or worse, a trip to the urgent care.
It turns out, many of the most common power tool blunders aren’t about lacking the latest tech; they’re about fundamental habits we sometimes forget. We all want to maximize our time and get the best results, but cutting corners on safety or proper technique is never the answer.
I’m talking about those seemingly small errors that can snowball into big headaches. So, if you’re ready to ditch those common mishaps and make every project a triumph, let’s dive into some practical, real-world advice to keep your projects on track and your workshop safe.
We’re going to uncover exactly how to avoid those frustrating slip-ups and work smarter, not just harder. Let’s get into it!
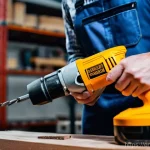
Underestimating the Power of Personal Protective Equipment

You know, it’s funny how often we hear the old adage, “Safety first,” but how quickly it can become “Safety…eventually.” I’ve been there myself, staring down a quick cut with the circular saw, thinking, “Oh, it’s just one cut, I don’t need my safety glasses for this.” And every single time, without fail, a tiny wood chip, a speck of sawdust, or a stray spark seems to defy gravity and make a beeline straight for my eye. It’s not about being clumsy; it’s about acknowledging that accidents are, by their very nature, unpredictable. What might seem like a minor inconvenience – donning a pair of glasses or slipping on some gloves – is literally the only thing standing between you and a potentially life-altering injury. Trust me, a few extra seconds upfront can save you a lifetime of regret, not to mention a hefty emergency room bill. It’s a habit that needs to be as ingrained as plugging in the tool itself, and it’s one of the easiest ways to ensure your workshop experiences remain joyful, not painful. Sometimes we get so caught up in the excitement of a new project or the urgency of finishing a task that we sideline the very things designed to keep us safe. But a true craftsman knows that preparedness isn’t just about the tools; it’s about protecting the most valuable tool of all: yourself.
The Unsung Heroes: Eye and Ear Protection
I can’t stress this enough: your eyes and ears are irreplaceable. Think about it – flying debris from a router, sawdust plumes from a sander, or even metal shards from grinding can turn a good day bad in a split second. I once had a tiny piece of wood rebound from a drill bit, and if it weren’t for my trusty safety glasses, I’d have been in a world of hurt. It’s not just the big, obvious dangers either. Prolonged exposure to the piercing whine of a table saw or the roar of a planer can cause permanent hearing damage that creeps up on you over time. My dad, bless his heart, spent years in his garage without proper ear protection, and now he struggles to hear conversations in crowded rooms. Learn from his experience and mine: invest in a good pair of ANSI-rated safety glasses or a face shield, and comfortable, high-N.R.R. (Noise Reduction Rating) earmuffs or earplugs. They’re not just accessories; they’re essential. This isn’t just about avoiding a hospital visit; it’s about preserving your quality of life and continuing to enjoy your craft for decades to come. When you’re in the zone, it’s easy to forget about the cumulative effect of noise, but your future self will thank you for taking these simple steps.
Gloves, Respirators, and Footwear: The Often-Forgotten Fundamentals
Beyond your eyes and ears, there’s a whole host of other protective gear that often gets overlooked. I’ve seen countless folks handling rough lumber or metal without gloves, only to end up with splinters, cuts, or nasty scrapes. While you might not want thick work gloves when operating a sensitive power tool, a good pair of fitted, cut-resistant gloves can make a huge difference for material handling. And let’s talk about dust. If you’re cutting MDF, sanding hardwoods, or even just working with treated lumber, those microscopic particles aren’t just annoying; they’re seriously hazardous to your lungs. A proper respirator, even a simple N95 mask, can prevent long-term respiratory issues. Don’t even get me started on footwear! How many times have I dropped a heavy piece of wood or a tool on my foot? More than I care to admit! Steel-toed boots aren’t just for construction sites; they’re a smart choice for any serious home workshop. They offer crucial protection against falling objects and accidental punctures, and frankly, they just make you feel more secure and confident when you’re wrestling with heavy materials. These aren’t overkill; they’re smart choices that build a foundation for safe and enjoyable DIY endeavors.
Skipping Crucial Pre-Operation Checks
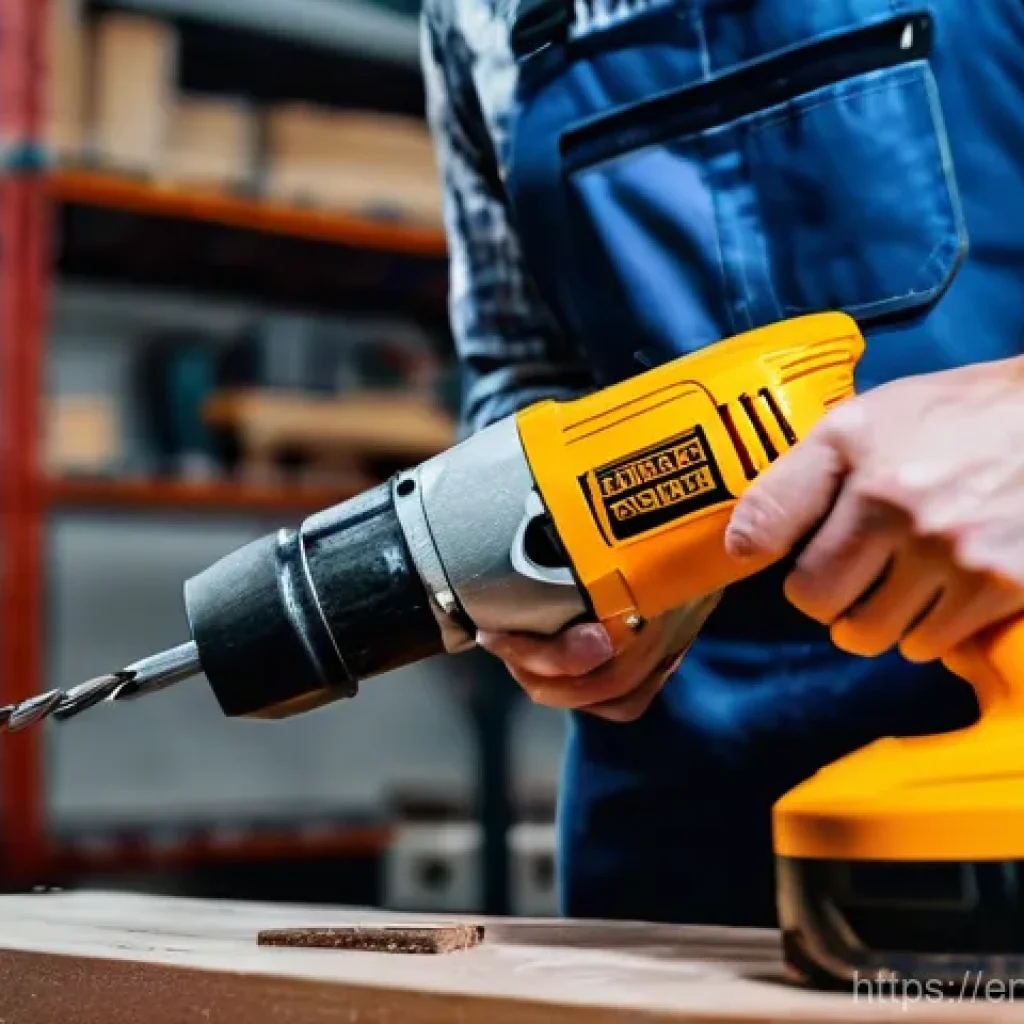
Alright, hands up if you’ve ever been so excited to start a project that you just grab a tool, plug it in, and go. Yeah, I’m guilty as charged too, especially in my earlier days! It’s that adrenaline rush, that eagerness to see your vision come to life. But I’ve learned the hard way that a few moments of impatience can lead to hours of frustration, or worse, a dangerous incident. A dull saw blade, a loose drill bit, or a damaged power cord isn’t just inefficient; it’s a ticking time bomb. Think about it: a dull blade forces the tool to work harder, increasing the risk of kickback and making a rough cut. A wobbly bit can splinter your workpiece or even snap off entirely. And a frayed cord? That’s an electrocution hazard, plain and simple. Taking those extra minutes to inspect your tools before you hit the power switch is like a pre-flight check for an airplane – absolutely non-negotiable for a smooth and safe journey. It’s about building a consistent habit that will save you time, materials, and potential injuries in the long run. I’ve found that a quick visual inspection becomes second nature after a while, and it dramatically reduces unexpected mid-project hiccups.
Inspecting Blades, Bits, and Accessories
Before any serious work begins, I make it a point to give my blades and bits a thorough once-over. Is that circular saw blade still sharp, or is it showing signs of wear and tear? A dull blade doesn’t cut; it tears and burns, creating more friction, more heat, and a greater chance of kickback. Similarly, I check my drill bits for any bends or chips. A damaged bit won’t create a clean hole and can easily bind in your material. For router bits, I ensure they’re clean of any dried-on resin which can affect their cutting performance and lifespan. And crucially, I make sure all accessories are properly installed and tightened. A loose dado stack on a table saw, for example, is an accident waiting to happen. The same goes for fastening router bits securely in the collet. This isn’t just about efficiency; it’s fundamental to both the quality of your work and your personal safety. I’ve had bits come loose mid-cut, and it’s a jarring, terrifying experience that nobody wants to repeat. A quick check takes mere seconds, but its value is immeasurable.
Checking Power Cords and Electrical Safety
This is one area where I absolutely refuse to cut corners. Before plugging in any tool, I visually inspect the power cord for any nicks, cuts, or frayed insulation. A damaged cord isn’t just a minor issue; it’s a serious electrical hazard that can lead to shocks, fires, or tool damage. I also check the plug itself to ensure the prongs aren’t bent or loose, and that the ground prong (if applicable) is intact. If I see any damage, that tool gets tagged for repair or replacement immediately – no exceptions. Furthermore, I always use appropriate extension cords that are rated for outdoor use (even if I’m indoors) and can handle the amperage of the tool I’m using. Overloading a thin extension cord can cause it to overheat, creating a fire risk and potentially damaging your tool. It’s a simple step, but one that could literally save your life or your home. It’s easy to overlook something as seemingly mundane as a cord, but it’s the lifeline of your tool and deserves your full attention every time you use it.
Ignoring the Importance of Workpiece Stability
You know, there’s a distinct difference between holding a piece of wood and *securing* a piece of wood. I used to think I had a firm grip on everything, especially for smaller cuts. “Oh, this little piece? I can just hold it steady,” I’d tell myself. And then, inevitably, that small piece would shift ever so slightly at the critical moment, leading to a jagged cut, a ruined project, or a close call with a spinning blade. It’s an easy mistake to make, fueled by a bit of overconfidence or a desire to just get the job done. But let me tell you, one of the biggest revelations in my own workshop journey was fully appreciating how crucial a rock-solid workpiece is for both accuracy and safety. When your material is truly stable, the tool performs as it’s designed to, cutting cleanly and predictably. When it’s not, you’re introducing an element of chaos into an operation that demands precision. It’s not just about clamping it down; it’s about understanding the forces at play and counteracting them effectively. This is where a little forethought can save you a lot of headache and heartache.
The Power of Clamps and Vices
Clamps are your best friends in the workshop, period. I’ve got a whole wall dedicated to different types – F-clamps, C-clamps, quick-grip clamps, bar clamps – because each serves a specific purpose. For sawing, routing, or drilling, you absolutely *must* secure your workpiece. A piece of wood held loosely on a workbench with just your hand is an invitation for disaster. The tool can grab it, spin it, or kick it back with surprising force. I’ve personally seen a piece of scrap wood fly across my workshop because I didn’t clamp it down properly before a quick cut. Use enough clamps to prevent any movement, and ensure they don’t interfere with your cut path. For smaller items, a bench vice is invaluable, providing a hands-free, secure hold. Remember, the goal isn’t just to keep the material from moving; it’s to create a stable, predictable platform for your tool to do its job. Don’t be shy about using extra clamps; it’s always better to be over-secured than under-secured. It’s a habit that significantly improves both the quality of your work and the safety of your environment.
Understanding Support and Clearance
It’s not enough to just clamp your workpiece; you also need to think about how it’s supported and what’s beneath it. When cutting with a circular saw or a jigsaw, you need to ensure the cutting path is clear and that the material being cut off has somewhere to go without binding the blade. I often use sacrificial boards underneath my workpiece to prevent tear-out and protect my workbench. This is especially important when using a drill press; you absolutely need a sacrificial board to prevent drilling into the table and to minimize tear-out on the back of your workpiece. For longer pieces, outfeed support is crucial. Trying to guide a long board through a table saw without proper support on the other side is incredibly dangerous, leading to potential tipping, binding, and kickback. I’ve built my own outfeed table and roller stands, and they’ve been game-changers for working with larger materials, providing consistent support throughout the entire cut. It’s about anticipating the movement of the material and tool, and providing a stable environment for both.
Misjudging the Tool’s Limitations and Capabilities
This is a big one, and it’s something I see even experienced DIYers get wrong sometimes: assuming a tool can do more than it’s designed for, or simply not understanding its optimal operating zone. It’s that moment when you try to force a small drill to drive a massive lag screw, or attempt to cut through thick material with an underpowered saw. I’ve been there, staring at a smoking drill motor, or a saw blade bogging down, thinking, “Why isn’t this working?!” And the answer is almost always the same: I was asking too much of the tool, or using it incorrectly for the task at hand. Every power tool has its sweet spot, its intended purpose, and its limits. Pushing beyond those limits doesn’t make you more efficient; it just leads to poor results, damaged tools, and increased risk of injury. It’s like trying to win a drag race with a minivan – it’s just not going to happen, and you’ll probably break the minivan in the process. Understanding what your tools are truly capable of, and respecting those boundaries, is a sign of a true craftsman.
Matching the Tool to the Task
One of the foundational principles of effective and safe power tool usage is selecting the right tool for the specific job. Trying to use a jigsaw for a straight, precise rip cut is going to lead to frustration and a wobbly edge. Conversely, attempting delicate curve cuts with a heavy-duty circular saw is equally misguided. I’ve seen people try to use an impact driver for fine joinery, which usually ends in stripped screws or splintered wood. Each tool is engineered with a particular function in mind. For example, a random orbital sander is fantastic for smooth finishes, but a belt sander is better for aggressive material removal. When you choose the appropriate tool, you’re letting it do the work it was designed to do, which means less strain on you, less strain on the tool, and a far better result. Take a moment to assess the material, the cut type, and the precision required, and then grab the tool that truly fits the bill. It’s a simple decision that has massive implications for your project’s success.
Respecting Speed and Feed Rates
This goes hand-in-hand with matching the tool to the task. Just because a drill can spin at 2,000 RPM doesn’t mean it should always spin at 2,000 RPM, especially when drilling into metal or dense hardwood. Similarly, trying to force a saw blade through thick material too quickly will bog down the motor, cause excessive heat buildup, and increase the risk of kickback. I learned early on that patience with feed rates is key. Let the tool do the work at its own pace. For drills, slower speeds are often better for larger bits and harder materials, preventing burning and prolonging bit life. For saws, a consistent, moderate feed rate allows the blade to clear chips efficiently and make a clean cut. Different materials and different operations require different approaches. Always consult your tool’s manual for recommended speeds and feed rates, and pay attention to how the tool sounds and feels as you work. If it’s straining, you’re probably pushing it too hard. This table provides a quick reference for common tools and their optimal usage parameters:
| Tool | Common Mistake | Best Practice |
|---|---|---|
| Circular Saw | Forcing cuts, using dull blade | Let the blade do the work, keep blades sharp, ensure proper depth settings |
| Drill/Driver | Wrong speed for material/bit, over-tightening | Vary speed by material, use appropriate bit size, set clutch for torque control |
| Router | Taking too deep a cut at once, feeding too fast | Take multiple shallow passes, maintain consistent feed rate, use sharp bits |
| Table Saw | No fence or improper fence alignment, standing directly behind blade | Always use a fence, check alignment, stand to the side of the blade, use push stick |
Overlooking Proper Body Positioning and Stance

You know, when I first started out, I probably looked like a contortionist trying to work with power tools. I’d be hunched over, twisted awkwardly, or standing right in the line of fire, all in the name of “getting a better view.” It wasn’t until I started noticing how experienced carpenters and metalworkers moved around their tools that I truly understood the art of proper body positioning. This isn’t just about comfort, though that’s a huge bonus; it’s fundamentally about safety and control. An awkward stance can throw off your balance, reduce your leverage, and put you in a vulnerable position if the tool kicks back or the material shifts unexpectedly. I’ve had my fair share of close calls because I wasn’t positioned correctly, and those moments quickly taught me the value of a strong, stable foundation. Your body is an integral part of the power tool system, and how you position it directly impacts the tool’s performance and your ability to react safely to anything unexpected. It’s a subtle but profoundly important aspect of workshop safety.
Maintaining a Balanced and Stable Stance
Think of yourself as an athlete preparing for action. When operating power tools, your feet should be shoulder-width apart, providing a broad and stable base. Avoid leaning over the tool or the workpiece in a way that could cause you to lose balance if there’s a sudden movement. I always try to position myself so that I can shift my weight comfortably and quickly, allowing for a natural follow-through with the tool. For instance, when using a circular saw, I stand slightly to the side of the cut line, never directly behind the blade, so that if there’s a kickback, the material isn’t coming straight at me. Similarly, when using a drill press, I ensure my stance allows me to apply even downward pressure without having to strain or overreach. A balanced stance gives you maximum control over the tool and the material, reducing the likelihood of slips, errors, and injuries. It’s about being grounded and prepared for anything that might happen, rather than being caught off guard by an unforeseen event.
Keeping Hands and Fingers Clear of the Danger Zone
This might seem obvious, but in the heat of a project, it’s incredibly easy to let your guard down. I’ve had more “near misses” than I care to count, simply because my hand was *almost* in the path of a blade or bit. The key is to always be acutely aware of the “danger zone” around any moving part of a power tool and to keep your hands and fingers well outside of it. For table saws, this means using a push stick or push block, especially for narrow cuts, and never, ever reaching over the spinning blade. With routers, ensure your hands are securely gripping the handles and are clear of the bit during operation. When drilling, ensure your free hand is holding the workpiece securely, but away from the exit point of the drill bit. It’s not just about avoiding direct contact; it’s about anticipating where the material might move or where a piece could kick out. Always think one step ahead. If you have to ask yourself, “Is my hand too close?” it probably is. Err on the side of caution every single time – your fingers will thank you.
Neglecting Regular Tool Cleaning and Maintenance
This is probably the most overlooked aspect of power tool ownership, and it’s something I neglected far too often when I was starting out. I mean, who wants to spend time cleaning when you could be building, right? But what I quickly learned is that a neglected tool is an inefficient tool, a dangerous tool, and ultimately, a tool with a dramatically shortened lifespan. It’s like owning a high-performance car and never changing the oil. Eventually, something’s going to seize up, and it’s usually at the worst possible moment. Sawdust buildup can gum up moving parts, reducing precision and increasing friction. Dull blades force the motor to work harder, leading to overheating and premature wear. Dried resin on router bits can cause burning and tear-out. I’ve had to replace expensive tools simply because I didn’t take the few minutes after each use to clean them properly. It’s not just about aesthetics; it’s about preserving your investment and ensuring your tools operate at their peak performance, safely and reliably, for years to come. A little bit of TLC goes a very long way.
Post-Use Cleaning Rituals
For me, cleaning my tools after each use has become a ritual. It doesn’t have to be an hour-long ordeal; often, it’s just a few minutes. I use a shop vac to clear away sawdust and debris from saws, sanders, and routers. A stiff brush helps dislodge stubborn grime. For saw blades and router bits, a specialized resin remover spray works wonders to dissolve built-up sap and pitch, which can significantly impair their cutting ability. I also make it a point to wipe down metal surfaces with a light coat of rust preventative, especially in my somewhat humid garage. This prevents corrosion which can affect moving parts and lead to costly repairs down the line. It’s amazing how much difference these small actions make. Not only do my tools last longer, but they also perform better, delivering cleaner cuts and smoother finishes. Plus, walking into a clean, organized workshop the next morning just feels better, doesn’t it? It sets the tone for a productive day.
Sharpening and Lubrication Schedules
Beyond daily cleaning, there are periodic maintenance tasks that are equally crucial. Sharpening saw blades, planer knives, and chisels isn’t just about getting a better cut; it reduces strain on the tool’s motor and on you. A sharp blade glides through material effortlessly, while a dull one fights and tears. I regularly check my drill bits and router bits for sharpness and replace them when they’re beyond salvaging with a quick hone. Lubrication is another key factor. Moving parts, like the height adjustment on a table saw or the plunge mechanism on a router, benefit greatly from occasional lubrication with a dry lubricant or specific grease recommended by the manufacturer. This ensures smooth operation and prevents premature wear. I even keep a small logbook to track when I last sharpened certain blades or lubricated specific tools, so I don’t forget. These preventative measures might seem like extra work, but they are absolutely essential for prolonging the life of your expensive tools and keeping them operating at their safest and most efficient.
Underutilizing the Owner’s Manual and Manufacturer Guidelines
Okay, let’s be honest. Who *actually* reads the owner’s manual cover to cover? I know, I know, it’s usually the first thing we toss aside after getting a new gadget, right? Especially when it comes to power tools, there’s often this unspoken assumption that “a drill is a drill” or “a saw is a saw,” and we just figure we know how to use it. But let me tell you, I’ve had so many “aha!” moments, even after years of using a tool, by simply revisiting the manual. These guides aren’t just for beginners; they contain a treasure trove of specific safety warnings, optimal operating procedures, maintenance schedules, and even troubleshooting tips unique to that particular model. Every tool, even from the same brand, can have subtle differences in features or recommended usage that can drastically impact both your safety and the quality of your work. Ignoring this valuable resource is like trying to navigate a new city without a map – you might get there eventually, but you’ll probably take a lot of wrong turns and get into some sticky situations along the way. Trust me, it’s worth the read!
Decoding Tool-Specific Safety Features
Each power tool comes with a host of safety features designed by engineers to keep you out of harm’s way, and the manual is your key to understanding them. For example, some circular saws have electric brakes that stop the blade almost instantly when you release the trigger. Others have blade guards that automatically retract. My miter saw has specific instructions on how to properly use the hold-down clamp and when to engage the dust collection port for maximum efficiency and safety. Many tools have lockout switches or safety keys that prevent accidental startup, which is critical if you have curious kids or pets around. I’ve learned about blade change mechanisms that seemed counter-intuitive until I read the step-by-step guide. Knowing exactly how these features work, and how to properly engage or disengage them (when applicable), is paramount. Don’t assume; educate yourself. It’s often these subtle, tool-specific safety mechanisms that prevent common accidents, and the manual is the only definitive source for this crucial information. It’s not just a booklet; it’s a personalized safety briefing for your specific piece of equipment.
Grasping Optimal Operating Procedures
Beyond safety, the owner’s manual often provides the blueprint for getting the absolute best performance out of your tool. It details things like recommended blade types for different materials, optimal RPM settings for various tasks, and even specific techniques for making certain cuts or drills. For instance, my plunge router manual clearly explains the maximum depth of cut per pass for different bits, which is crucial for preventing burning and ensuring smooth operation. It also details the proper direction of feed for various routing operations, a common source of kickback if done incorrectly. I also look for information on recommended accessories and attachments, which can unlock new capabilities for a tool I thought I knew inside and out. Following these guidelines isn’t about being rigid; it’s about leveraging the manufacturer’s expertise to work smarter, not harder. It ensures that you’re using the tool exactly as it was intended, leading to superior results, less wear and tear on the equipment, and ultimately, a more satisfying and efficient workflow in your workshop. It’s truly a guide to unlocking your tool’s full potential.
Wrapping Things Up
Whew! We’ve covered a lot today, haven’t we? It’s truly amazing how a few simple habits and a dash of common sense can completely transform your workshop experience from potentially harrowing to consistently joyful and productive. I’ve learned these lessons, sometimes the hard way, over years of sawdust and sweat. Trust me, the sheer satisfaction of creating something beautiful or fixing something broken, all while knowing you’ve done it safely, is unparalleled. Don’t ever let the excitement of a project overshadow the fundamental responsibility of protecting yourself and your tools. It’s about building a sustainable passion, one safe cut, one precise drill, and one well-maintained tool at a time, ensuring you can keep tinkering and creating for decades to come.
Useful Information to Know
1. Emergency Preparedness is Key: Beyond just preventing accidents, it’s smart to be prepared for the unexpected. Have a well-stocked first-aid kit readily accessible in your workshop. Knowing where your fire extinguisher is and how to use it is also a non-negotiable, especially when working with flammable materials or creating sparks. A small investment here can make a world of difference when seconds count.
2. Organize for Safety and Efficiency: A cluttered workspace isn’t just annoying; it’s a huge safety hazard. Make a habit of tidying up as you go, and ensure every tool has a designated “home.” Wall-mounted storage like pegboards or French cleats are fantastic for keeping frequently used tools visible and off your work surfaces, reducing trip hazards and making your workflow smoother.
3. Invest in Quality PPE and Replace When Needed: Your personal protective equipment is your first line of defense. Don’t skimp on safety glasses, ear protection, or respirators. Check them regularly for wear and tear. Cracked lenses, worn-out earmuff pads, or clogged respirator filters reduce their effectiveness and compromise your safety. Think of it as replacing the tires on your car – essential for optimal performance and safety.
4. Consider a Buddy System for Heavy or Hazardous Tasks: For particularly demanding or potentially dangerous jobs, don’t be afraid to ask for an extra set of hands or at least let someone know what you’re up to. Lifting heavy lumber, maneuvering large sheets of material, or tackling complex cuts can be much safer and easier with a helper. Even a quick text to a friend saying, “Hey, I’m about to do XYZ in the garage,” adds a layer of accountability and safety.
5. Continuous Learning is Your Best Tool: The world of tools and techniques is always evolving. Stay curious! Watch new instructional videos, read articles from trusted sources, and even consider taking a workshop or class on specific tools or skills. The more you know, the safer and more effective you’ll be. Think of it as an ongoing journey – there’s always something new to learn that can make your DIY adventures even better.
Key Takeaways
At the end of the day, your safety in the workshop boils down to a few fundamental principles that, once ingrained, become second nature. Always prioritize your Personal Protective Equipment – eyes, ears, lungs, and hands are irreplaceable, so shield them diligently. Never skip those crucial pre-operation checks on your tools and power cords; a few moments can prevent a major incident. Ensure your workpiece is rock-solid and stable before any cut or drill, eliminating unpredictable movements. Respect your tools’ limitations and capabilities, matching the right tool to the right task and letting it work at its intended pace. Maintain a balanced body position and keep your hands clear of the danger zone, always anticipating the tool’s movement. Finally, make regular tool cleaning and maintenance a non-negotiable habit, and never underestimate the wealth of specific safety and operational knowledge contained within your owner’s manual. By embracing these practices, you’re not just avoiding accidents; you’re cultivating a safer, more enjoyable, and ultimately more productive environment for all your creative endeavors. Your well-being and the longevity of your tools depend on it!
Frequently Asked Questions (FAQ) 📖
Q: So, what’s the absolute biggest mistake people make, even experienced DIYers, that leads to accidents or ruined projects?
A: Oh, this is such a crucial question, and honestly, it’s one I’ve learned the hard way myself! The single biggest blunder, in my humble opinion, isn’t about some super complex technique or fancy jig.
It’s the simple, everyday oversight of not properly securing your workpiece. Seriously, I’ve seen it, and I’ve even done it – you think, “Oh, it’s just a quick cut,” or “This piece is heavy enough, it won’t move.” And that’s exactly when disaster strikes.
When your material isn’t firmly clamped or properly supported, it’s a recipe for trouble. The tool can kick back violently, the piece can shift mid-cut leading to a jagged, useless edge, or worse, your hand could slip into the blade’s path.
I once tried to hold a small piece of trim by hand while using my miter saw, thinking I had a firm grip. The saw blade caught the edge, ripped it out of my hand, and sent it flying across the workshop like a missile.
Thankfully, no one was hurt, but that little piece of trim could have easily taken a finger with it. My rule of thumb now is: if it’s not absolutely rock-solid, it’s not safe to cut.
Invest in good clamps – quick-release clamps, C-clamps, even toggle clamps for jigs. Make sure your workbench is stable, and use non-slip mats. Don’t rely on brute strength; rely on proper workholding.
Trust me, taking an extra 30 seconds to clamp something securely will save you hours of frustration, wasted materials, and potentially a trip to the emergency room.
It’s the foundation of every safe and successful power tool project.
Q: I’m always struggling with getting clean, precise cuts. My saw sometimes splinters the wood, or the line isn’t perfectly straight. What’s the secret to those professional-looking results?
A: Ah, the quest for that perfectly clean, splinter-free cut – it’s a noble pursuit, and honestly, it’s what separates a “just okay” project from a “wow, that’s amazing!” one.
I’ve been there, staring at a beautiful piece of hardwood, only to have it marred by tear-out or a wavy cut. The “secret,” if there is one, isn’t just one thing, but a combination of factors that, once you get them right, feel like magic.
First off, your blade or bit. Is it sharp? Is it the right one for the material?
Trying to cut hardwood with a dull, low tooth-count blade meant for rough framing is like trying to shave with a butter knife – messy and ineffective.
Invest in high-quality, sharp blades appropriate for your material (more teeth for finer cuts, specific grinds for plywood or metal). A sharp blade does the work; a dull one just tears and burns.
Second, let the tool do the work, and pay attention to your feed rate. Don’t try to force your saw through the material. Listen to the motor – if it’s bogging down, you’re pushing too hard or too fast.
A smooth, consistent feed rate is key. For tear-out, try scoring your cut line first with a utility knife, or use a sacrificial piece of wood underneath your workpiece to support the fibers as the blade exits.
Also, make sure your fence or guide is perfectly square and securely locked down. Even a tiny bit of play can lead to a wonky cut line. I started getting much cleaner results the moment I slowed down, trusted my tools, and stopped rushing the cut.
It feels counter-intuitive to go slower, but it actually saves you time by avoiding do-overs!
Q: Beyond just basic safety and technique, what are some “pro-level” tips or common oversights that DIYers often miss, but that can really elevate their power tool game and ensure longevity for their tools?
A: This is where we really dive into making your workshop life smoother and your tools last longer! Beyond the essentials, there are definitely those “insider” tips that often get overlooked.
One major oversight I’ve noticed, and personally rectified in my own habits, is proper tool cleanup and storage after every use. I used to just toss my drill back in its case or leave my circular saw on the bench after a project, thinking “I’ll get to it later.” Big mistake!
Sawdust is insidious; it can get into motor vents, clog mechanisms, and even absorb moisture, leading to rust on unprotected metal parts. After each session, take a few minutes to blow out dust from vents (using an air compressor or canned air), wipe down surfaces, and check for any debris lodged in guards or moving parts.
For tools with exposed metal, a light coat of wax or a rust preventative can work wonders, especially in humid environments. I started doing this religiously with my table saw, and the difference in its smooth operation and lack of rust has been remarkable.
Another pro tip that makes a huge difference is knowing and respecting your tool’s limitations and using the right accessory for the job. Just because a drill bit fits in your impact driver doesn’t mean it’s the best tool for precision drilling.
Similarly, trying to push a tool beyond its intended capacity not only gives you poor results but also puts undue stress on the motor and gears, drastically shortening its lifespan.
If you need to cut a thick beam, don’t try to make multiple passes with a small circular saw; grab a beam saw or a large reciprocating saw. Understanding what your tools are designed for, and then maintaining them diligently, will keep them purring like kittens for years, saving you money and frustration in the long run.